Monday, March 19, 2012

Gender Reveal Party

In June of last year (2011), I was facing the half-way point of my pregnancy and eagerly anticipating the discovery of whether baby #2 was a boy or a girl. I had seen previous examples of gender reveal parties and knew that I couldn't pass up the opportunity to throw a special party, especially to celebrate my newest little one. Most of the parties I'd seen consisted of guests slicing open a cake or biting into a cupcake to reveal the hidden colored filling or batter. While this is an adorable idea, I'm always trying to find slightly new ways to do an event.

I started with pink and blue of every decor I could get my hands on!
We had pink and blue balloons, and some of them said "It's a boy" or "It's a girl" on them. I made signs to hang everywhere. I bought decorations for each gender. There were even pink and blue daisies on each table. Pink and blue was everywhere- down to the tablecloths, silverware, plates, and napkins. We even had kool-aid in both pink and blue for everyone to drink! I considered serving the foods that I had been craving, as a personal pregnancy touch, but I didn't figure that everyone wanted to eat salsa, pickles, and oranges. So, we ordered pizzas instead.

I strung the ultrasound pictures across the wall, but made sure to hide the gender revealing ones:

I asked all of the guests to wear pink or blue to showcase their guess for the baby's gender:

I, myself, stayed neutral and tie-dyed my own tank top blue an pink (didn't turn out as great as I hoped) and painted my toenails for the special occasion:

Finally, rather than having guests bite into cupcakes, I decided to have them bust open cupcake pinatas! I bought one girl pinata and one boy pinata. I filled each with lots of candy, and then one candy bar in each pinata had a sign taped to it revealing the baby's gender. This way, even when the pinata was opened, the guests still had to search for the right candy bar- more suspenseful in my opinion!


Surprise! Baby #2 is a boy!!! And we surprised everyone even further by announcing that we decided to completely change his name from the one we had been announcing all along! 
(Jaydon, my cousin, wearing the pinata as a hat.)

"You mean I'm having a baby brother?"
(Oh! How much of a difference 9 months makes! Josiah has grown so much!!!)

My best friend was just 3 months ahead of me in her pregnancy and she was also having a little boy:

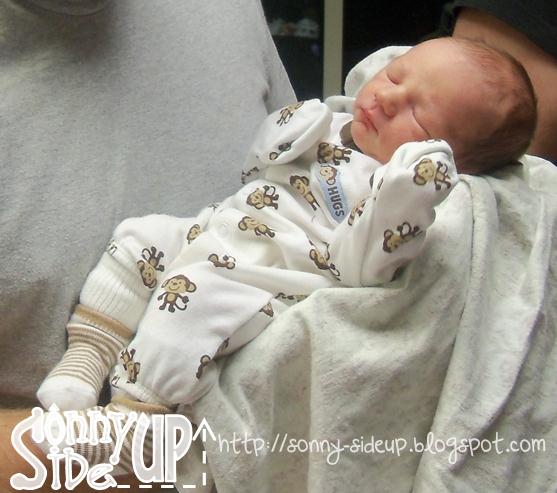
Less than 5 months later, my baby boy, Micah James arrived! 

Sunday, March 18, 2012

My Favorite Things Party- Bunko Preview

If you've never played Bunko before, you are MISSING OUT!!! I think it is one of the most fun party games around.

To start, each person gets a score sheet to keep track of their points throughout the game. (There are variations to these rules, but this is how I play...)
(This is the one I designed to match my party scheme.)

Everyone sits at tables of four and each person is paired up with the person across from them (for this round only). You start with "ones" and the first person rolls 3 dice in the attempt to get as many 1's as possible. One "1" gets 1 point, two "1's" gets 2 points, three "1's" is a BUNKO and is worth 21 points. You roll until you no longer get any 1's, keeping score with every roll, and then you pass the dice to the person on your left. The only exception to this is if you get three of any number other than the one you are attempting to get (1's in this case), then you get 5 points, and you still get to keep rolling. The person to your left now attempts the same thing. Your partner's points and your's are combined together to create your team score. If you score a BUNKO, those 21 points go towards your team points, but only you get to claim the BUNKO as your own. This is important when it comes to prizes at the end. Just mark a tally on the BUNKO line at the bottom of the score sheet.

Dice are being rolled simultaneously at all tables around the room, as players at each table are trying to get as many points as possible In the meanwhile, there is a head table who is controlling the pace of the game. They ring the bell to start, and when one of the teams at the head table rolls either a BUNKO or achieves 21 points, they ring the bell again to end the round for everyone.

Each team will compare their points to the opposing team's points. The winners will place a "W" by the first column's "1" and each person on the losing team will place an "L" on their line. The losers then stay at their table, but one person switches seats so that they are no longer on the same team. The winning team of each table rotates to another table, also switching seats to have a new teammate. However, at the head table, it is vice versa. The winning team stays and the losing team moves on to the next table in the circle.

When the head table rings the bell to begin the round, everyone starts rolling for "2's". Again, one "2" is one point, two "2's" is two points, three "2's" is a BUNKO, and three of any other number is 5 points. The round continues as the previous one did. And, when the round is over, each table rotates and repeats the process for "3's", then "4's", "5's", and "6's". After all 6 rounds, you can choose to start at "1" again, and most groups seem to do this 4 times, according to the sources I found while trying to refresh myself on the rules.

Once your group has played as many times as their hearts desire, each person needs to tally their wins, losses, and BUNKO's. Then the host awards prizes to the person who scores the most wins, the most BUNKO's, and yes, even the most losses! It's a fun way to ensure that everyone has fun, and even the sucky players can walk away with a prize! Some groups play for money, where each person in the group contributes an amount and it goes into the pot for the winners. However, in my experience, the host just provides fun goodies (like thermoses or soap sets or cooking utensils).

The game is fast-paced and high energy, not to mention a total blast for everyone who plays. I've done it both as a youth group full of teenagers at church and as a women's night out with adult ladies of all ages.

Right now, I'm working on making the prizes for my upcoming party's BUNKO game. Stay tuned to see what I'm giving away!

Wreck This Journal

I found this journal from Amy's @ "Sometimes Creative" Favorite Things Party. This is my first book to own from Keri Smith, but I thought this idea was so utterly creative that I couldn't wait to order one! The basic idea is that people often don't want to write in their journal for fear of "ruining" it. So, Keri created a journal that's meant to be completely destroyed. The pages are filled with instructions on how to creatively "wreck" your journal, including tearing it up, poking holes in it, licking the pages, taking it for a walk, sleeping with it, and a whole mess of other ridiculously crazy ideas. It makes me creative little head go spinning with ideas on how to mess this journal up! My family, on the other hand, thinks I'm totally nuts. And my husband can't believe I paid money for something I'm going to destroy. But I'm stoked! And I'm going to document my wrecking process!!!


The first page I did instructs me to write my name in several different ways, saying this book belongs to me.

Next, I numbered every page... 1 to 184 (this furthered Jesse's thinking of how crazy I am!):

Then, I was told to crack the spine:

It's hard to document this, but you can see that the pages no longer lay flat:

And, my last project for the day was to trace my hand:

Josiah's Mickey Mouse Party- Banners

Oh man! I wish I had better pictures of these banners because they turned out so great!


This was one of my favorite elements of the party!

I started with cutting out white cardstock into the size rectangles that I wanted. Next, I cut the black to go over it, cutting a wider stripe on the top and bottom and thinner stripe on the sides. I cut white squares and glued these over the black paper to make the film strip look- this was much easier than trying to cut out squares from the black with an x-acto knife or scissors!

Next, printed out pictures of each character from the computer after cropping them to be the right size for the rectangle. I made sure to print them in black and white and color them myself. This was so they would appear more uniform, rather than some color printed ones and some hand colored ones.

Then I printed out the phrase from Microsoft Word using the Minnie font and cut each letter out as well as some yellow stars. Then it was just a matter of gluing it all together and attaching the rectangles to each other with brads.

This picture is not very good since the banner was too large to photograph head-on. So, here are the 3 photos pieced together. At least you can see how it all hung together...

Oh! It was so cute!!!

Next, I used the same pattern as I did for the invitations and made a bunch of Mickey/Minnie heads. I left the Mickey ones blank (no pants) because I thought they'd be too busy looking if I had letters and pants. On the Minnie ones, I made a bow to top each one. I then printed out the phrase "Oh Two-dles" and glued each letter to the heads. I punched 2 holes in each ear and ran red ribbon through the holes to string the entire banner. The only pictures I have of the process and of close up are terrible ones from my phone:

At the party, I strung this banner on the opposite side of the table from the other banner- right where everyone could see it upon entering the party!

Josiah's Mickey Mouse Party- Food

In addition to cupcakes, we also had a cake. My mom found the cake pan and decorated it herself using pictures online as a guide for colors and details.
(It looked great! I wish I could've gotten a picture of it more straight on so you could see the whole thing.)

When it came to the rest of the food, we needed to have lunch food since the party was from 11am-1pm. And, when you think of Mickey Mouse Clubhouse, you know that hot dogs are a must! Hot dog! Hot dog! Hot diggity dog! So, we grilled up hot dogs for all of the guests with a special label:
(These were framed and posted by each item of food.)

With the hot dogs, we also had individual bags of chips:

"Mickey Ears" (Oreos):

and Mouska-Cupcakes:
 

Josiah's Mickey Mouse Party- Cupcake Toppers

One of my favorite things to make for any party is cupcake toppers. They are SO EASY and add in an additional personal touch to any event. I use punches to cut out these circles (scalloped and not) and they are a lifesaver!!!

I punch the outer layer with this punch, on any color cardstock of your choice:
 
(This is not the same size as mine- I think mine is 1 3/4" to 2"- but is the same style and brand)

Then I cut a slightly smaller circle with a circle punch, and finally cut my picture out with an even smaller punch  (both like this) :
 
My designs are created on Microsoft Word, by adding any clipart or word art to my page and outlining it with a circle the same size as my punch. Then you just turn the punch upside down (I'm not sure why they make it that way!) and punch it along the lines. You can glue the papers on top of each other or use scrapbooking tape. Then, the papers are glued onto a toothpick, sucker stick, or popsicle stick. All done and super easy!

For Josiah's party, I made 3 different Minnie themed toppers, 3 Mickey ones, and 2 generic ones. 

Josiah LOVED his cupcake...
... to put it mildly...


Josiah's Mickey Mouse Party- Centerpiece #2

While browsing ideas for Josiah's birthday party decorations, I was inspired by this site. Coincidentally, it was another Mickey Mouse party for another little Josiah! I used their idea for both the centerpiece of Josiah's name and for the hot air balloons centerpieces I am about to show you, as well as some signs that are still to come. Of course, I added my own personal touches!

I tried to make mine as much like the cartoon's version as possible. So, I used ceramic pots and painted them all red. I then used wire and twine to make the strings holding the balloon. The balloon was cut from a glove shape I found online, sewn up, and stuffed with cotton batting. Then black felt was glued on to create the accents on the glove. I also wrapped the twine around the edge of and created sandbags out of brown napkins and batting. I filled the pots with marbles to weigh them down and to have something for the toys to sit on. However, I learned later that they were not heavy enough! They kept falling down with every gust of wind at the party! EEK! So, for anyone replicating this (especially outside), I highly recommend making sure your centerpiece is heavy enough to withstand the wind! Finally, we used the extra batting underneath each balloon and spread out to create the look of clouds. I loved the look of them! Ready for pictures???


And, finally, these are the centerpieces in the midst of being made, but shows all 5 characters that we had:

Josiah's Mickey Mouse Party- Favors

One of my absolute favorite things to incorporate into birthday parties and baby showers are candy bar favors.

The process is pretty easy. I buy regular-sized Hershey bars in bulk. These don't have the foil wrapping and the extra paper around it. Instead, they just have a plastic wrapper around them.
  

I leave them wrapped in their original wrapper, but cover the outside in white wrapping paper. This hides the brown plastic and gives my bar a nice, clean packaging. Wrap it just like a present, and I highly recommend using white wrapping paper from the $1 store. Then I cover the candy bar with the wrapper that I designed, fitting the theme of the party. Because I've done this so many times, I've got the template saved to my computer, and I just customize it according to the theme of the party, printing it out on cardstock paper from my printer. You can use scotch tape over the edges but I prefer double-sides tape beneath the edge to have a cleaner look.

For Josiah's party, I couldn't resist creating these adorable candy bar favors. I made Mickey Mouse for the boys and Minnie Mouse for the girls.

You can't see the buttons or polka dots when the wrapper is folded, but they're an extra cute element when the bar is unwrapped.


These were a big hit with the party guests and turned out great.

*Template is available for sale at my Etsy shop.